Jaguar Type E Convertible Sports Car 1/24 Heller Review
Jaguar E-Blazon (07668)
1:24 Revell
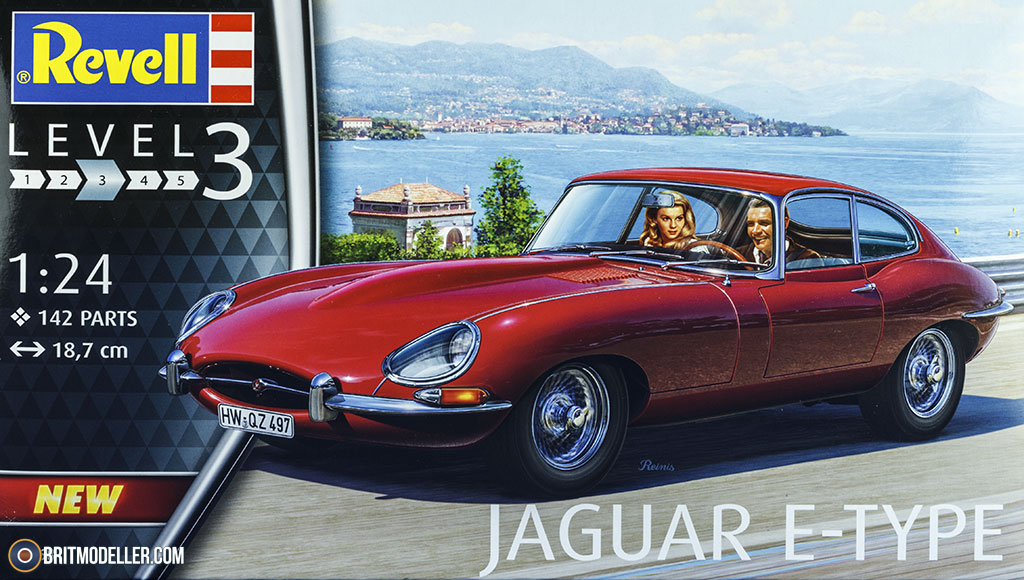
The E-Type is perhaps Jaguar'southward best-known type, and was one of their most successful too. Based on, but very different from their D-Type racer, it introduced a number of modern features that we have for granted today, such every bit a monocoque-type body that removed the weight and bulk of a ladder-chassis, adding disc brakes, a powerful engine, and a mod steering rack that gave the driver first-class feedback on which to gauge their performance. It was beloved by purchasers, and fifty-fifty competitors, one of whom rated it as the most cute car ever made. Information technology retained its popularity through the years and at that place are yet many examples on the road, and even a replica that costs many hundreds of thousands more than the original - become effigy. It was in product from 1961 to '75, known as the XK-E in the USA, and was available first overseas, with drop-top and coupé versions, a choice of engines, fit and finish, and the occasional special edition throughout the Serial, which extended from 1 to 3 with over 72,000 made before it was replaced by the "Marmite" XJ-S that polarised Jag lovers, although fourth dimension seems to accept softened the opinions of those that disliked it initially, as did the improvements over the years before it also was replaced by the soap-bar shaped XK8.
The Kit
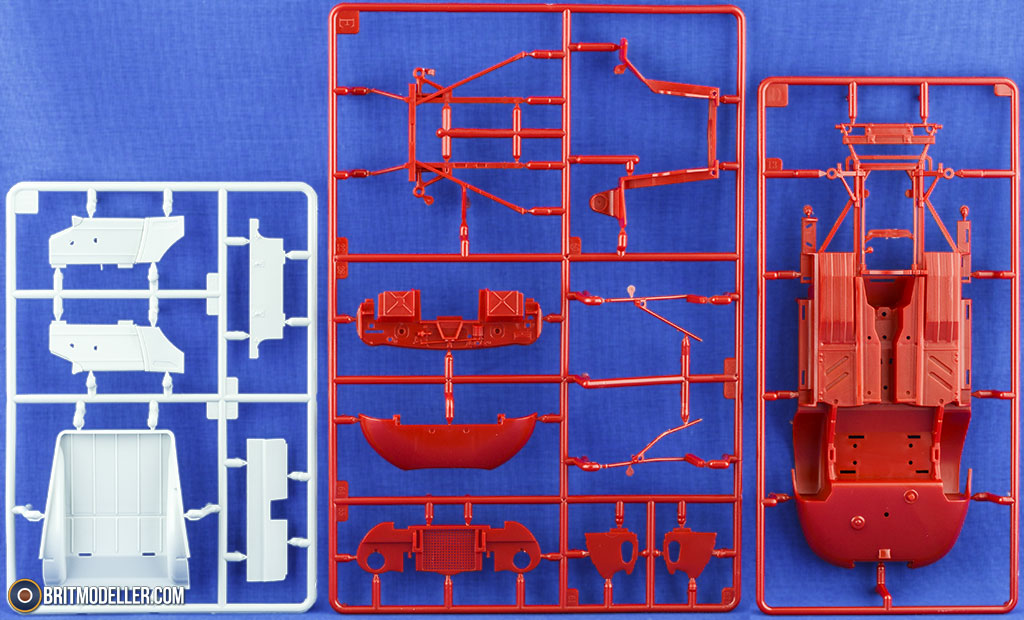
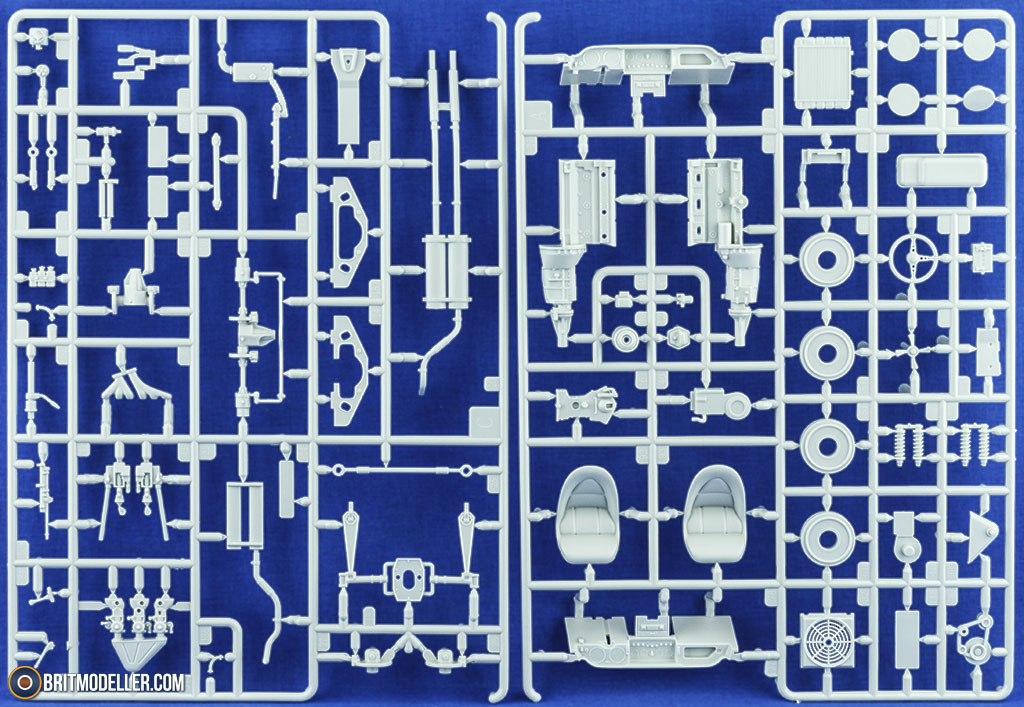
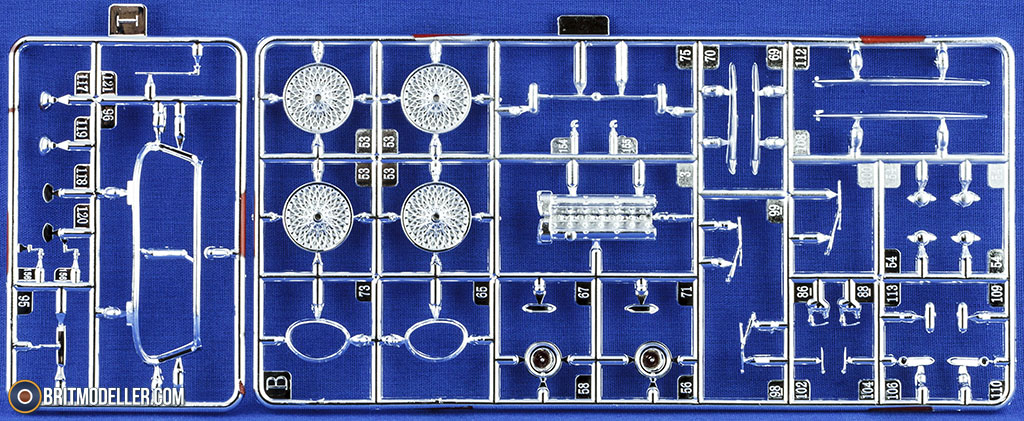
This is a brand-new tooling from Revell, and we've had news of information technology coming for a wee while now, and there's been a lot of word on our forum for one, so probably elsewhere also. Yes, I'm insular, I can't help information technology  Now that information technology's hither we tin take a await in the box and see what all the hubbub has been nigh. Information technology arrives in one of those terminate-opening boxes, and inside are three sprues in light grayness/green styrene, ii in "chrome", two sprues and two torso parts in cerise, 2 clear sprues, iv flexible black "safety" tyres, a decal sheet, instruction booklet and a helpful condom sheet. Information technology'south a colourful model even earlier you go your paintbrush out, and while some of you folks might not like the chrome out of the box, nosotros're not all perfectionists, and it can be removed pretty easily, although I can't for the life of me call back how at fourth dimension of writing. While we're on the field of study of Chrome, you should see the new Mirror paint from Stuart Semple. It's pretty pricey, but it's damn expert, and you can see a picayune bit well-nigh information technology on my contempo build of Sputnik-ane here. Deplorable about that diversion – I've got a matter nearly that paint, and Stuart's crawly.
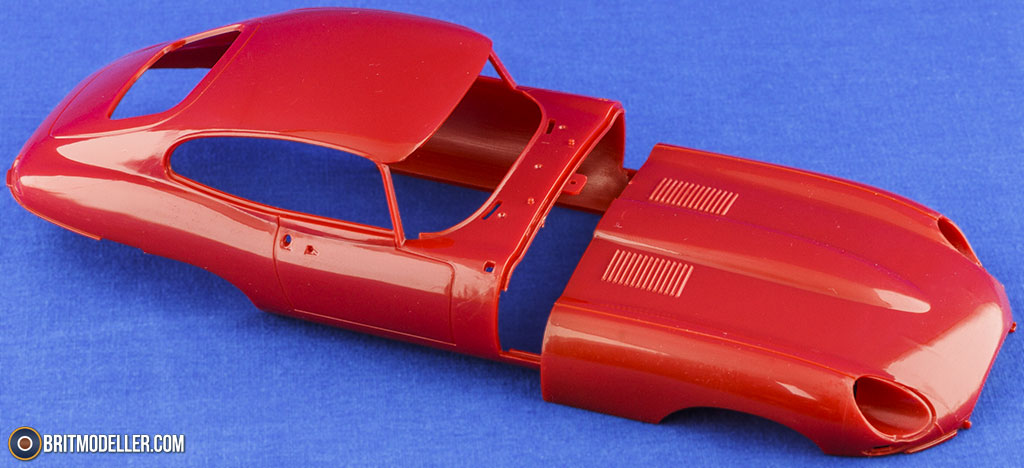
You get ONE bodyshell, I simply thought you'd like to come across it from a couple of angles.
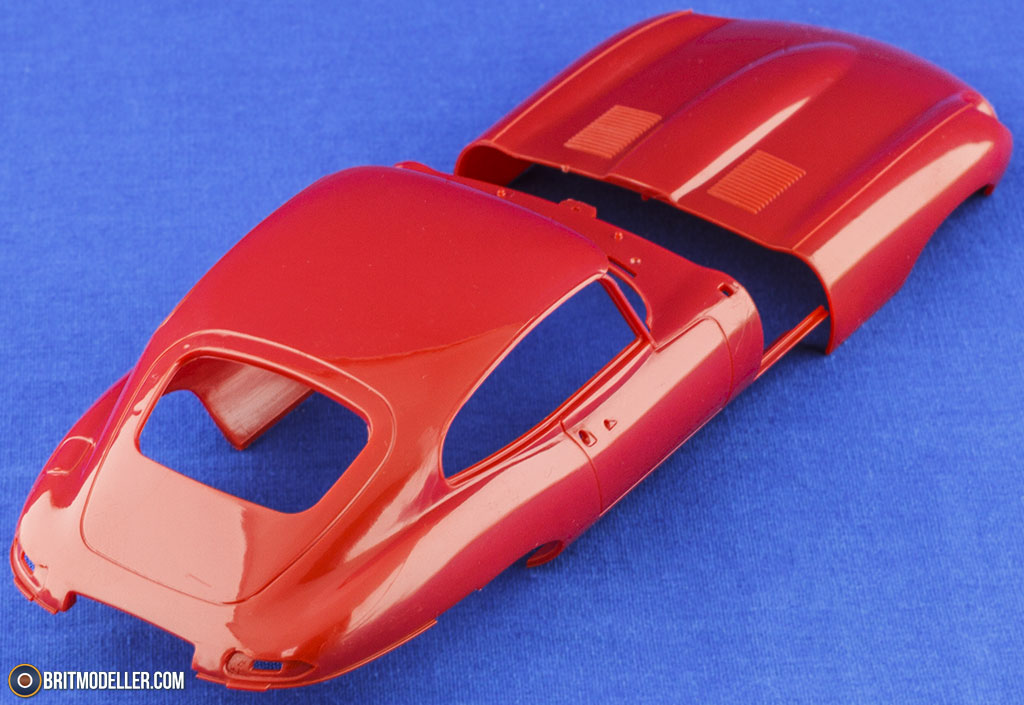

Information technology's a thoroughly modern tooling, but there are a few ejection marks that you might desire to cover up if you're putting the effort in. My sample had a few small scratches on the fly stubs due to it being packaged with the bonnet/hood in the same pocketbook. There are also a few tiny sink-marks here and there around the roof besides, so get to work on those before you start edifice in earnest so that they don't bite you afterward. The inside of the roof also has a strange raised serpentine design to information technology that is reminiscent of an ants' burrow, and might show upwards nether the glaze of dark gray pigment yous're advised to apply. Getting that flatted back might besides be an thought in example your viewers have a habit of getting into the dark areas of your models.
Structure begins with the engine block, which comes as two halves with the transmission moulded in, and has the sump and rocker comprehend added, then the ancillaries, fan-belt, and the exhaust manifold with six-into-two downpipes. At the rear is a differential, drive-shafts and suspension-link, bookended front end & rear by a pair of formers. The suspension units either side of the unequal are covered past the lower swing-artillery, the information technology'south time for the twin exhausts and their mufflers to be made up, then added nether the chassis in one case the engine has been popped in between the front rails, so that the manifold and pipes can be mated. The framework nether the bonnet is side by side, getting painted along the style, then beingness put to the side while the firewall and front end brakes/steering are inserted into the chassis. A pair of drop-links slip in between the lesser of the restriction assembly, gluing into the pinnacle of the bonnet framework, then it's fourth dimension to fill the bonnet/hood with stuff! The triple-carbs are fed by the airbox, with a choice of left and correct hand steering boxes, battery, radiator and a bunch of other little ancillaries that festoon the surface area.
Moving back indoors, you can cull the right- or left-hand bulldoze, with decals appropriate for each, plus pedal-box and steering-cycle fitted underneath in your choice of positions. The center console is made upward with a central shifter, and a handed hand-brake, so make sure you drill out the correct hole in the underside before you go on with the gluing. I of the appealing features of the East-Blazon was its practicality, which included a fair baggage infinite, depicted by an internal skin and bulkhead slice that will be painted blackness and glued in the rear of the flooring forth with a modesty console and so decaled with the chrome décor strips, and a couple of niggling chrome handles depression downward in the front of the cab and some decal vents that they operate. The nuance slides in and locates on some pegs and ledges in the flooring, then the two door cards are detailed with handles and window-winders, both of which are chromed. Unexpectedly, they adhere to the sills of the floor pan, and are then joined by the two seats, which are each single parts and have nicely moulded cushion details included. They look strange to modern eyes though with the lack of head rests and seat belts.
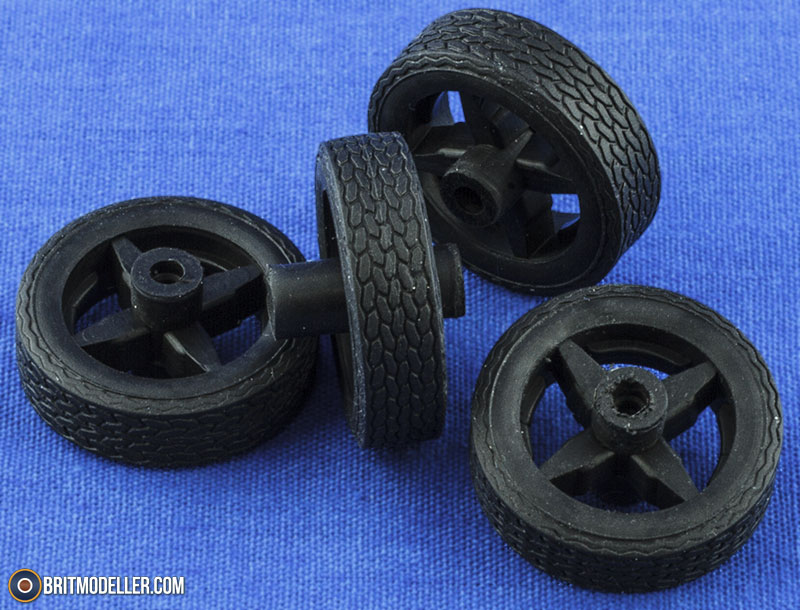
Even a Jag won't go anywhere on its own without wheels, and these are side by side to be fabricated up. The flexible tyres have a cruciform sprue arrangement in the middle that must be cut out with a abrupt blade, then in the front the chromed hub and spokes are inserted, which should look good with a night wash to bring out the spokes. At that place's a carve up hammer-on locking nut as is appropriate for the era, and then at the rear is a simple hub with a hole in the eye and a cap that will glue onto the axle, leaving the cycle able to rotate if you're frugal with the glue. With four of those washed it's time to prep the bodyshell, pigment information technology, paint the interior a dark gray, add together the chrome rear-view mirrors and then flex it to install it on the floor pan. The slightly contentious front windscreen is side by side, with the chromed bezel added first, just there are some sprue-gates on the sides that volition either need touching in, or stripping and repainting, depending on your feelings on the job. The windscreen slips in from the outside, and then the remainder of the glazing is fitted, once more from the exterior, requiring a fine line of silver paint around the edges before y'all insert them into the frames. More chrome parts with clear inserts brand up the rear calorie-free clusters, joined by the rear bumper halves and a central clear reversing light, so a pair of chrome bumper overriders, and a option of EU or US number plate frame.
The E-Type is well-known for its gigantic bonnet, which takes up a large proportion of the front end, and makes pulling out of some junctions fun. The underpinnings are made up first, with the lights inserted into the front bulkhead, which is and so fitted into a frame that holds the bonnet to shape once it is glued in place in the huge panel. The curved lower is then put in identify below, and every bit this is a separate office on the existent matter, you can leave the seamline at that place equally it'south mostly occluded by the bumpers anyway, unless your references prove otherwise. There is a choice of colour for the light "tunnel", using either trunk colour, silver or black, so while you lot have your references out you might want to check that as well. With the pigment pick decided, the chrome bezels and clear lenses are glued in, and the indicators join them with chrome base and clear lenses. The front end bumpers are besides fitted as halves, then joined together by adding the central section with moulded-in overriders that hide the join between the iii parts. There is another choice of Eu or US plate frames, which glue to the lower lip of the oval intake nether the bumpers. More chrome is added in the shape of wing mirrors with clear lenses, an aeriform at the centre of the roof 1.5mm aft of the windscreen frame, three small-scale windscreen wiper blades, and door handles to finish off the model.
Markings
Many of the supplied decals are used up in the cockpit, providing a comprehensive set of dials and instruments for the interior, a number within the engine bay, and smaller details around the vehicle, including meshes, grilles and stencils. In general, someone has taken a lot of time and endeavor to create a gear up of decals that really drills downwardly into the particular, from filler cap logos to shock absorber badges, alternator crush cutting-out patterns and bombardment filler caps – remember the not-sealed batteries that needed topping upwardly with deionised h2o from time to fourth dimension? The rest of the decals are number plates from various countries, plus a set of generic East-Type plates for showroom examples. A few "driving abroad" country stickers round out the sheet if you experience the urge to apply one.
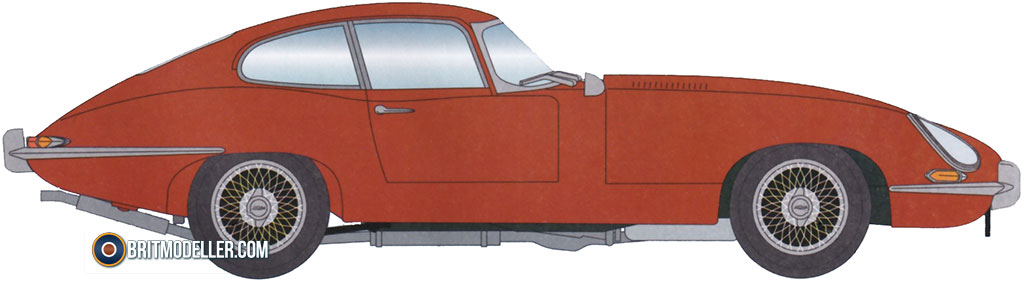
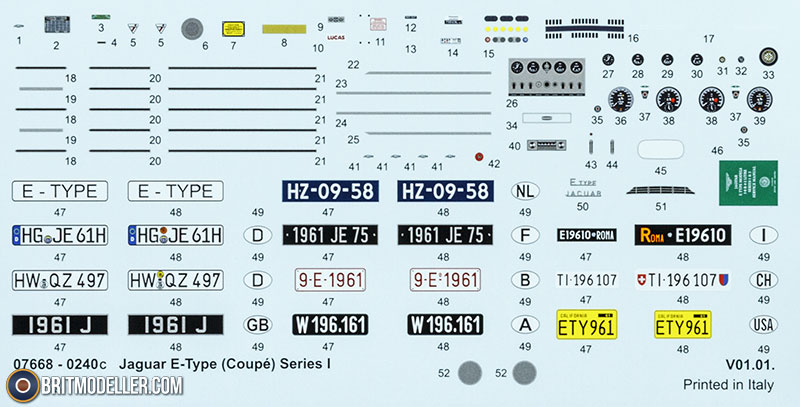
There is one colour selection shown on the instructions, which is red, but you're at liberty to paint it whatever color you like. Decals are by Cartograf, which is a guarantee of expert registration, sharpness and colour density, with a sparse gloss carrier motion-picture show cutting close to the printed areas.
Decision
This is a modern kit of a archetype automobile, and has plenty of detail moulded-in for the item hound to finesse and add to. The decal sheet is fantabulous, and if you can alive with the slight consequence with the forepart windscreen angle and curve, it'south a great kit. I've taped the screen in position myself and stared at it comparing it with pictures of the existent thing, and information technology'southward a very slight difference in shape from what I can brand out.
Very highly recommended.

Revell model kits are bachelor from all good toy and model retailers. For further data visit
![]()
![]() or
or 
Source: https://www.britmodeller.com/forums/index.php?%2Ftopic%2F235086419-jaguar-e-type-07668-124%2F
0 Response to "Jaguar Type E Convertible Sports Car 1/24 Heller Review"
Post a Comment